DE
DE  EN
EN  RU
RU  PT
PT  JA
JA  ES
ES  IT
IT 
 |
Your new robot cell is ready, the floor is poured, and the go-live deadline is non-negotiable. The last thing you need is a fencing installation that requires hot work permits, fails the EHS audit, or becomes a wobbly maintenance headache causing nuisance trips. The question isn’t just what bolt to use, but how the entire anchoring system secures your compliance, uptime, and future flexibility. |
Beyond the Bolt: Why Floor Anchoring is the Bedrock of Robot Safety
When planning a new robotic work cell, engineers meticulously design the robot’s reach, the conveyor integration, and the safety logic. Yet, the method of securing the Roboter-Schutzzäune to the floor is often treated as an afterthought. This is a critical oversight. A robust anchoring system is not just about holding a post upright; it’s the foundation that guarantees the entire system’s structural integrity, compliance with standards like ISO 14120, and long-term operational reliability.
A weak or improperly secured fence can lead to catastrophic failures during an impact event, such as a forklift collision or a robot dropping a heavy payload. Furthermore, unstable posts cause door sag, leading to misalignment of safety interlocks and costly, intermittent production stops that are a nightmare to diagnose.
The Anatomy of a Rock-Solid Anchorage System
A compliant and durable floor connection is an engineered system, not just a hardware choice. It consists of three core components working in unison to translate forces safely into the foundation.
- The Post and Base Plate: The process starts with a heavy-gauge Q235 carbon steel post, typically 60x60mm. This isn’t just a hollow tube; it’s welded to a substantial base plate (e.g., 140x140x5mm). This plate acts like a snowshoe, distributing the overturning force from an impact across a wide area of the concrete floor.
- The Fastener (The “How”): The connection is made using heavy-duty wedge expansion bolts (typically M10x70mm). When tightened, a clip is pulled up through a sleeve, expanding it to grip the inside of the drilled hole in the concrete. This creates immense pull-out and shear resistance, effectively making the post an extension of the floor itself.
- The Concrete Foundation (The “Where”): The system relies on the compressive strength of your industrial concrete floor (typically 3,000 PSI or higher). The expansion bolts transfer the load from the post directly into this solid mass.
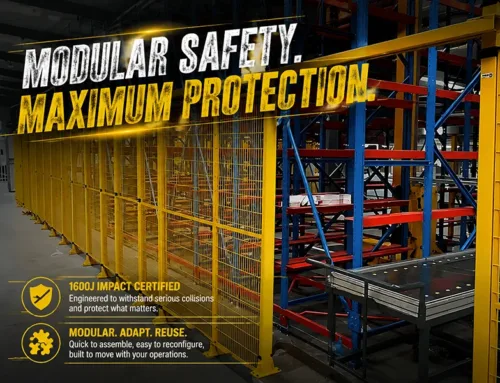
This entire assembly is designed to withstand the certified 1600 Joules of impact energy—equivalent to a 220 Lbs object hitting the fence at 12.5 mph—without failure, ensuring that what happens inside the cell, stays inside the cell.

Installation Efficiency: The Power of Cold Assembly
For any system integrator or plant manager, time is money. Traditional welded-on-site solutions introduce massive inefficiencies and risks that a modern modular system eliminates.
| Dimension | Before: Traditional Welding | After: Mdfence Bolted System |
|---|---|---|
| Work Type | Hot Work: Requires fire permits, fire watch personnel, and extensive cleanup. Sparks and fumes create hazards for nearby equipment and personnel. | Cold Assembly: Only requires standard hand tools like a hammer drill and wrenches. No sparks, no fumes, no fire risk. |
| Installation Time | Slow and labor-intensive. Involves cutting, grinding, welding, and on-site painting. Highly dependent on welder skill. | Up to 70% faster. Two technicians can install over 150 feet in a single day. All components are pre-finished and ready to assemble. |
| Asset Value | A sunk cost. When the production line is reconfigured, the entire fence is cut out and becomes scrap metal. Asset reusability is 0%. | A movable asset. The system can be unbolted, reconfigured, and reinstalled in a new location. Asset reusability is 95%+. |
| Compliance & Finish | Inconsistent weld quality. On-site painting is prone to chipping and rust, often failing EHS audits in high-spec facilities. | Factory-controlled quality. Standardized components and a durable powder-coat finish ensure a professional look that passes any audit. |
Step-by-Step Guide to Securing Mdfence Posts
Achieving a secure, compliant installation is straightforward with the right process. Here’s a simplified guide for anchoring your Maschinenabschirmung posts:
- Layout and Mark: Using your CAD layout, accurately mark the center-point for each post’s base plate on the concrete floor.
- Drill the Holes: Use a hammer drill with a properly sized masonry bit (e.g., a 14mm bit for M10 bolts) to drill to the specified depth. Clean all debris from the holes.
- Position and Secure the Post: Place the post’s base plate over the holes. Insert the expansion bolts and tighten them to the manufacturer’s recommended torque specification. This ensures the wedge is properly engaged.
- Assemble the Panels: Once the posts are secure and plumb, you can begin attaching the mesh panels using the provided high-strength steel fixing rings and M8 bolts. The rigid posts ensure a perfect fit and alignment.
This simple, repeatable process guarantees that every post has the same holding power and that your entire industrielle Schutzzäune system performs as a single, integrated unit.

The Long-Term Payoff: An Investment in Uptime and Flexibility
Properly securing your robot safety fence to the floor pays dividends long after the installation is complete. It’s a direct investment in your facility’s operational efficiency. Solidly mounted posts prevent the door sag that causes safety interlocks to misalign, eliminating a common source of nuisance trips and maximizing your Overall Equipment Effectiveness (OEE). Most importantly, this modular, bolted approach treats your safety system as a flexible asset. When your production needs change, your fence can be reconfigured right alongside your robots, protecting your initial investment and giving you the agility to adapt and grow.
Häufig gestellte Fragen
1. What type of floor is required to properly secure the fencing?
The standard anchoring system is designed for industrial-grade reinforced concrete floors with a minimum thickness of 6 inches and a compressive strength of at least 3,000 PSI. For other floor types, such as structural steel or mezzanines, specialized mounting plates and hardware are required. Contact our experts to discuss your specific application.
2. Can the fencing be installed on a slightly uneven floor?
Yes. While a level floor is ideal, minor variations can be accommodated. Shims can be placed under the post base plates before final tightening to ensure the posts are perfectly plumb, which is crucial for smooth door operation and proper safety switch alignment.
3. What are the essential tools needed for a standard installation?
A standard installation requires no welding or specialized fabrication. You will need a rotary hammer drill with the correct size masonry bit, a set of metric wrenches or a socket set for tightening the bolts, a tape measure, a level, and a layout drawing. This “cold assembly” approach significantly simplifies and speeds up the process.
4. How does the floor anchoring contribute to the overall impact rating of the system?
The floor anchor is the final link in the energy dissipation chain. During an impact, the force travels from the mesh, through the frame, into the post, and down to the base plate. The expansion bolts transfer this energy into the massive concrete slab, which safely absorbs it. Without a secure anchor, the post would simply tip over, rendering the entire fence ineffective.
5. If we need to move a robot cell, can the floor anchors be reused?
The posts and panels are 100% reusable. The expansion bolts, however, are typically a one-time use item. Once removed, the wedge mechanism may not provide the same certified holding power. For a new installation, it is always recommended to use new expansion bolts in freshly drilled holes to guarantee safety and compliance.